At a glance
- Confirm the exact iPhone/Mac requirements before planning a call around Continuity Camera.
- Lock the phone, keep the rear cameras facing you and unobstructed, then preview in the call app.
- A desk dock is not automatically a certified camera mount.
An iPhone can serve as a Mac webcam through Apple’s Continuity Camera feature when the device pair, settings, and physical position meet Apple’s requirements. A reliable preflight checks those three things before the meeting starts. This guide helps you spot a blocked lens or unsupported orientation early; it does not claim that a desk stand is a certified camera mount.
Inventory the exact iPhone and Mac first
Write down the iPhone model, Mac model, and operating-system versions. Compare that pair with Apple’s current Continuity Camera requirements. Avoid relying on “recent iPhone” or “new Mac” as a compatibility test; requirements are specific and change over time. Check that the relevant settings and accounts follow Apple’s instructions, and do not promise every app or device pairing will be available.
Before moving hardware, decide on a fallback: the Mac’s built-in camera, another supported webcam, or audio-only participation if the meeting allows it. A fallback makes a failed preflight a planning issue rather than a last-minute scramble.
Set the phone in a supported position
Apple’s guidance calls for the iPhone to be nearby, locked, stable, with its rear cameras facing the user and unobstructed. Begin on a dry, uncluttered desk. Place the phone so the lens cluster points toward you and remains clear of the stand, cable, monitor, and any desk item. Do not reverse a mount or rotate its arm beyond the maker’s stated range to imitate a photo.
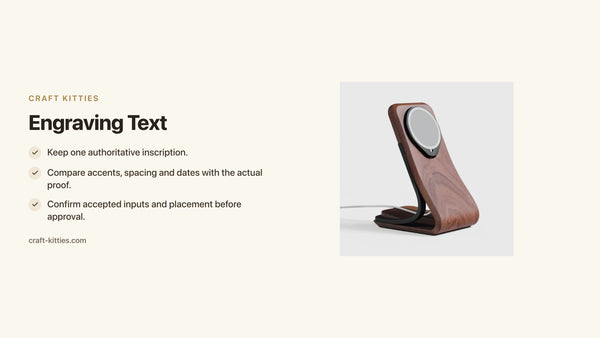
A product listing may show a phone held upright, but that does not demonstrate a webcam angle or guarantee that the rear cameras face a seated user. The ClassicStand is described as having a tray; the ArcFusion lists 155 mm overall height and a 75 × 83 mm base. Those published dimensions do not prove camera alignment, stability with a particular phone, or Continuity Camera certification. Review the ClassicStand or ArcFusion listing only as a starting point for asking about permitted positioning.
Verify the app before the call begins
Unlock the Mac and open the video app you intend to use. Find its camera selector and check whether the iPhone appears. Select it, then preview the image from the position where you will sit. Confirm the rear-camera view includes you and does not crop your face or point at the desk. If the app has a manual framing control, try it in preview and note the original framing so you can restore it. Apple’s video-effects documentation describes model and system requirements for available effects; Center Stage or Desk View availability should not be assumed for every combination.
Try a short local preview before a real meeting, and close it without starting a meeting. This is a setup check, not a claim that we tested a particular model or app.
Diagnose the first failure you can observe
| Observation | Check to keep constant | Next step | What the observation does not prove | Stop or fallback when… |
|---|---|---|---|---|
| Rear lens is partly blocked | Phone and app selection | Move desk objects or change the supported position | It does not show a compatibility failure | The stand blocks the lens in every permitted orientation |
| Phone rotates or feels insecure | Same phone case and desk surface | Check the stand maker’s allowed orientation and placement | It does not establish the stand’s load rating | Stability would require reversing or forcing the support |
| iPhone not available in app camera menu | Exact models, OS versions, settings | Recheck Apple’s source-listed requirements and connectivity steps | One app’s list does not diagnose every app | Requirements are not met or the camera still does not appear |
| App selects iPhone but image is poorly framed | Keep the selected camera | Adjust the phone only within permitted movement; preview available framing controls | It does not prove Center Stage is supported | A useful image needs an unsupported angle |
| Incoming call interrupts setup | Keep call/notification behavior in mind | Reopen the preview and reselect the camera if needed | One interruption does not show a hardware fault | The setup cannot be restored before the meeting |
Record the first failing step, not just “webcam didn’t work.” That note tells you whether to ask Apple about device requirements, the app maker about camera selection, or the stand maker about physical position.
Keep the desk mount claim narrow
A dock or charging stand may be useful for desk placement, but product category names do not prove it was designed or certified for a rear-camera webcam position. Do not claim Continuity certification, lens clearance, or a guaranteed video angle. Ask the stand maker for exact permitted rotation and stability information. For desk layout ideas, see our phone stand and wireless charger guide and home-office charging station ideas; neither replaces Apple’s compatibility list.
Treat compatibility, physical framing, and app selection as three independent gates. A compatible device pair can still produce a poor image if the lens points away from you; a stable phone can still be absent from an app’s camera list if its model requirements are not met. Write the result of each gate separately. A short checklist might read: “requirements matched per Apple; phone locked and stable; rear lenses clear; iPhone visible in app camera menu; preview framed from seated position.” If one item fails, you have a specific next question rather than a vague sense that the mount is wrong.
Account for the way your desk will be used during the actual call. A monitor riser, lamp, or hand reaching for a keyboard may block the rear camera after you sit down. Move only ordinary desk objects during the preflight; do not compensate by extending or reversing an arm outside the stand maker’s stated range. Check the view with your chair and monitor in their normal positions, then leave the phone undisturbed until the call.
Keep one backup camera selected in your meeting app if the app allows it, but verify that selection before the call. If the phone is removed or an incoming call interrupts the setup, reopen the preview and confirm the active camera again. Do not assume the last-selected device remains active across every app restart or system update.
For example, note “Apple requirements checked for both exact models; phone stable and locked; camera unobstructed; iPhone unavailable in app selector.” That sequence points toward app/setup requirements rather than encouraging you to adjust the stand. A different result—camera selectable but framing blocked—belongs to the physical positioning question.

Description
FAQs
Can I use any iPhone and Mac together?
No. Check the exact model and software requirements in Apple’s Continuity Camera guidance before depending on a pairing.
Does an iPhone stand automatically work as a webcam mount?
No. A desk stand is not automatically certified or designed for rear-camera framing. Verify its allowed orientation and check that the phone remains stable with lenses unobstructed.
Why does the iPhone not appear in the camera menu?
Check the model pair and Apple’s setup requirements first, then the camera selector in the specific app. Do not diagnose the problem from the stand alone.
Should I turn on Center Stage?
Only if the effect is available for your device and system combination. Check Apple’s current documentation and preview the result before the call.