At a glance
- Light scratch: walnut or olive oil paste, takes two minutes
- Deep scratch: wax stick or wood marker, no refinishing needed
- Prevention is cheaper — solid wood coasters stop most everyday damage before it starts
Every piece of solid wood furniture accumulates scratches over time. Red oak dining tables, walnut desks, beechwood coffee tables — none of them is immune to the drag of a ceramic mug, the slip of a set of keys, or the edge of a laptop slid across the surface without thinking. The good news is that most of these scratches are shallow enough to fix in under ten minutes with things already in your kitchen or drawer. Refinishing is rarely the answer; knowing which repair method matches which scratch is.
This guide walks through how to assess the damage, which household and off-the-shelf methods work on what kind of scratch, and how to approach the specific hardwoods — red oak, walnut, beechwood — that make up most quality wood furniture. At the end, a short note on the single easiest way to stop new scratches from forming on a table surface before they start.
How to tell what kind of scratch you are dealing with
Before reaching for anything, the first step is a simple test: drag your fingernail slowly across the scratch. That one action tells you almost everything.
If the scratch is invisible to touch — your nail glides over the surface without catching — the damage is entirely in the finish (the clear coat, lacquer or wax layer), not in the wood itself. These are surface scratches. They catch light at an angle but disappear straight-on. They are the easiest to treat and the most common type on well-maintained furniture.
If the scratch catches your fingernail but the groove is shallow and the wood at the base still shows its original color, it is a light-to-medium scratch. The finish is broken and the very surface of the wood is lightly scored, but no material is truly missing. Most household methods work here.
If the scratch is deep enough to see a groove clearly, and the base of the groove shows raw, lighter wood — meaning the pigment and grain pattern are interrupted — you have a deep scratch or a gouge. These require a filler-type approach: a wax stick, wood filler or a furniture repair crayon rather than a conditioning treatment.
One more category to distinguish: white water rings. These look like scratches from across the room but are trapped moisture in the finish, not physical grooves. They respond to different methods (heat or mild abrasive paste) and are worth identifying separately so you do not treat them with a wax stick and wonder why nothing changed.
Household methods for surface and light scratches

The walnut method — for light scratches on darker wood
Break a raw walnut in half and rub the cut surface firmly along the scratch, following the wood grain. The natural oils in the walnut darken and condition the exposed wood fibers, temporarily reducing the contrast between the scratch and the surrounding surface. After rubbing, buff the area with a soft cotton cloth in small circular motions, then wipe clean along the grain.
This method works best on medium-to-dark woods — walnut furniture benefits most obviously since the tone match is near-perfect, but it also works on red oak and beechwood pieces with amber or honey finishes. On very light-colored or painted wood, the walnut oils may darken the surface more than the scratch itself, so always test on an inconspicuous spot first. The result is not permanent — it is a conditioning treatment that reduces visibility — but it can last months with normal use, and the repair takes about two minutes with no tools.
Olive oil and baking soda paste — for surface scratches on any wood
Mix a small amount of olive oil with just enough baking soda to form a thick paste — roughly equal parts by volume. Apply the paste to the scratch with a soft cloth and rub gently along the grain, using light pressure. The baking soda acts as a very mild abrasive that buffs the finish, while the olive oil conditions and darkens the exposed area. Wipe clean with a dry cloth after thirty seconds of gentle rubbing.
This method is most effective on surface scratches where the finish is lightly dulled or hazed. It is not a filler; it will not close a groove you can feel with your fingernail. Think of it as a reset for the immediate surrounding finish rather than a structural repair. On red oak and beechwood, the color effect is subtle and natural. On walnut, the olive oil darkening complements the wood's deep brown tone well.
Petroleum jelly — for very fine surface marks
For hairline surface marks on a dark finish, petroleum jelly applied with a fingertip and left overnight can plump the surrounding finish slightly and make the mark less visible. Wipe off any excess in the morning and buff with a dry cloth. This is the lightest-touch option in the kit — not suitable for anything deeper than a hairline — but useful when the scratch is more of a scuff in the finish sheen than a physical break.
How to fix white water rings while you are at it
White rings and white hazes on wood surfaces are not scratches but are often confused with them, and they are worth addressing in the same session. Both are caused by moisture trapped in the finish layer, not by physical damage to the wood.
The warm iron method: place a clean, dry cotton cloth over the water ring and briefly press a warm iron on top for five to eight seconds. Lift and check. The gentle heat draws the trapped moisture out of the finish. Do not use steam and do not leave the iron in place — the goal is a quick pass, not sustained heat. Most water rings respond to one or two passes.
The toothpaste method: a small amount of non-gel white toothpaste (not whitening formula) rubbed gently along the ring with a soft cloth acts as a mild abrasive. After thirty seconds of gentle circular buffing, wipe clean and buff dry. This works on older, more set rings that do not respond to heat alone.
Neither method touches actual scratches, but water rings and scratches often appear together on a coffee table or dining surface, and knowing which is which saves you from reaching for the wrong tool.
Wax sticks and markers for deeper scratches

When a scratch catches your fingernail and the household methods do not fully close it, a wax stick or wood repair marker is the next step. These are inexpensive and available at any hardware store; a basic set covering four or five wood tones handles most situations.
Wax fill sticks
A furniture wax stick (also sold as a burn-in stick or repair crayon) is rubbed directly into the scratch to fill the groove. The technique is simple: press the stick into the scratch at an angle, work it back and forth along the grain until the groove is filled slightly above the surface, then use a plastic card or your fingertip to level the excess. Finish by buffing gently with a soft cloth.
Color matching is the skill here. The common mistake is matching the darkest part of the wood grain; it is better to match the mid-tone of the surrounding surface, then build up with a slightly darker layer if needed. For walnut furniture, a dark walnut or espresso-toned stick sits naturally in the grain. For red oak, a golden oak or warm mid-brown tone blends with the characteristic amber-honey color. For beechwood, a light natural tan or golden beech shade matches the pale, even grain without looking plugged.
After filling, the wax is permanent until physically removed — it will not re-open — but the surface over it will be matte unless you buff it. For a piece with a satin or semi-gloss finish, a light pass of furniture wax or finishing oil over the repair area will bring the sheen closer to the surrounding surface.
Wood markers for fine scratches with intact structure
Wood markers (also called touch-up markers or furniture repair pens) work differently from wax sticks: they are a colorant rather than a filler, so they are best for scratches where the groove is very shallow but the color contrast is the main problem. Apply the marker along the scratch following the grain, let it dry for thirty seconds, and buff lightly. The marker stains the exposed wood fiber to match the surrounding tone.
Unlike wax, a wood marker is not reversible, so color-matching before committing is essential. Test on an inconspicuous area — the back of a leg, the underside of a shelf — before applying to a visible surface. Most brands offer dual-ended markers with two brown tones, which helps with blending on furniture where the grain shifts between dark and light.
Deeper gouges: wood filler and when to use it
For gouges — defined here as damage wide enough that a wax stick will not hold or visible enough that a marker cannot hide the shape — wood filler is the appropriate repair. Stainable latex wood filler applied with a putty knife, sanded flush when dry and then matched with a marker or stain, is the closest a DIY repair gets to invisible on deep damage.
The honest caveat: deep gouge repairs on fine wood furniture are genuinely difficult to make invisible, especially on figured grain like walnut burl or quartersawn oak. If the piece has significant value and the gouge is prominent, a professional furniture restorer is the right call. For everyday solid wood furniture — dining tables, desks, side tables — wood filler plus a color-matched finish is a realistic, durable solution.
How to fix scratches on specific hardwoods
Red oak
Red oak's open grain and warm honey-amber tone make it one of the easier woods to touch up. The bold grain pattern draws the eye, which means small repairs in the right color range become nearly invisible from a normal viewing distance. Use warm brown to golden oak wax sticks and markers; avoid anything with a gray or cool undertone, which will read as foreign against red oak's warmth. The open grain also means the wax stick fills slightly more easily than on tighter-grained species — work slowly and flush the excess cleanly.
Walnut
Solid walnut furniture has a tight, fine grain and a deep brown color that ranges from medium chocolate to near-espresso depending on cut and light. Deep walnut tones absorb touch-up materials naturally, which makes repairs forgiving on color but exacting on sheen: walnut's characteristic quiet luster is hard to fully replicate with wax. After a wax stick repair on walnut, a light application of walnut-specific finishing oil over the whole surface (not just the repair) brings the sheen back into uniformity and refreshes the grain.
Beechwood
Beechwood is pale, straight-grained and even-toned — beautiful, but unforgiving of color mismatches. A wax stick that reads "close enough" on walnut will look obviously plugged on beech. Use the lightest available tone in your repair kit and apply sparingly; it is easier to add a second thin layer than to remove excess from pale wood. Beechwood also responds very well to the olive oil and baking soda paste method for light surface scratches, which conditions the grain without adding any visible pigment.
The repair sequence, end to end
For a typical dining table or coffee table with a mix of light surface scratches and a few deeper marks, the most efficient approach is to work from lightest to heaviest repair in a single session:
1 — Clean the surface. Wipe with a barely damp cloth to remove dust and oils. Let it dry fully before any repair material goes on.
2 — Treat surface scratches and water rings first. Walnut or olive oil paste on the light scratches; warm iron on any water rings. These require no drying time and set the baseline for what is still visible.
3 — Apply wax stick or marker to remaining visible scratches. Work in daylight or good overhead light — the angle you need to assess a repair is rarely the angle you use while sitting at the table.
4 — Level and buff. Once all fills are dry (wax is immediate; filler takes the time indicated on the package), buff the entire surface with a clean dry cloth. This step equalizes the sheen across repaired and un-repaired areas and brings out the grain.
5 — Apply a protective finish. A thin pass of furniture wax or finishing oil over the whole surface — not just the repairs — is the step that makes a repair look like maintenance rather than patchwork. It also extends the time before the next session of repairs.
Protecting solid wood table surfaces from new scratches
The most effective long-term strategy is not repair — it is prevention. Most everyday table scratches come from three sources: glasses and mugs dragged or set down without care, objects with rough or gritty bases, and fabric items (placemats, napkins) that trap fine particles and act as abrasives when moved.
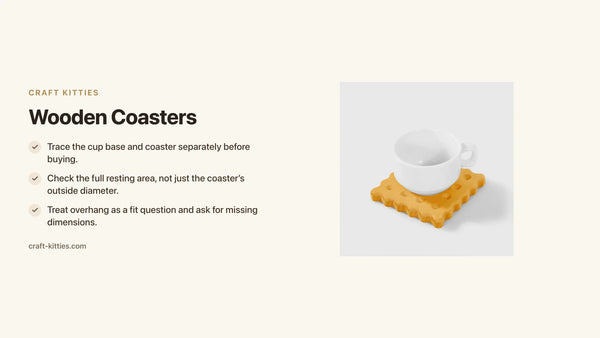
Solid wood coasters address the first and most common of these directly. A coaster placed consistently under every glass and mug eliminates the circular water rings and the fine scratches that come from ceramic bases contacting the finish repeatedly. Over months, the difference in surface condition between a table used consistently with coasters and one used without is striking — not because any single event caused major damage, but because hundreds of small contacts accumulate.

Description
Solid beechwood coasters — same species as many coffee tables and dining sets — feel right at home on a wood table rather than looking like protective gear. The natural grain of the beechwood surface, lightly finished to protect it without sealing it completely, also means the coaster itself develops character over time rather than looking like a placeholder.

Description
For walnut or dark-stained furniture, a set of solid walnut coasters keeps the material language consistent. Walnut's tight, dark grain against a walnut table surface reads as intentional; the coasters become part of the table composition rather than objects placed on top of it.
Description
Description
Description
Comparison — scratch repair methods side by side
| Method | Best for | Skill level | Durability | Cost |
|---|---|---|---|---|
| Walnut rub | Surface scratches, dark woods | Beginner | Weeks to months | Near zero |
| Olive oil & baking soda paste | Surface scratches, any wood | Beginner | Weeks | Near zero |
| Warm iron (water rings) | White rings only | Beginner | Permanent if used correctly | Zero |
| Wax fill stick | Light to medium scratches, any wood | Intermediate | Long-term | Under $10 |
| Wood repair marker | Shallow scratches needing color match | Intermediate | Permanent | Under $15 |
Decision guide — which method for your situation
| Your situation | Start here |
|---|---|
| Scratch invisible to touch, catches light at an angle | Olive oil and baking soda paste, two minutes |
| Scratch on walnut or dark wood, light catch with fingernail | Walnut rub, then buff — often sufficient alone |
| Scratch clearly felt with fingernail, color still present | Wood repair marker, color-matched to your species |
| Scratch with visible groove and raw wood showing at base | Wax fill stick, then marker over top if needed |
| White ring or haze, no groove felt | Warm iron method, not scratch treatment |
| Deep gouge with material loss | Stainable wood filler, sand flush, then match finish |
Mistakes that make repairs more visible, not less
Using sandpaper on an isolated scratch. Sanding creates a dull patch that reads as conspicuous from across the room because the surrounding finish sheen does not match. Unless you plan to sand and refinish the entire panel, sandpaper belongs off the table for scratch repair.
Picking the wrong color because you matched the darkest part of the grain. Wood grain shifts between light and dark bands — match the mid-tone average of the surface, not the darkest streak. A marker that exactly matches the darkest walnut grain will look like a dark stripe against the lighter bands.
Skipping the final full-surface buff. Applying a wax stick repair and then buffing only the immediate area leaves a local sheen variation that draws attention to exactly the spot you were trying to hide. A full-surface buff after all repairs unifies the sheen and makes the repair invisible at a glance.
Applying oil treatments to a recently waxed surface. Wax is a barrier — oil applied over wax sits on the surface rather than conditioning the wood. If your piece has had a recent wax treatment, wipe lightly with a dry cloth first to clear the surface, or use a wax-compatible product rather than straight olive oil.
Trying to fix a scratch the same day as a heavy cleaning. Some cleaning products leave a residue that prevents wax and markers from bonding cleanly. Let the surface sit dry for at least two hours after any cleaning before doing repair work.
FAQ — fixing scratches on wood furniture
1 — Can you really fix scratches on wood furniture with household items? Yes — for light surface scratches, olive oil and baking soda, walnut meat, or a matching wood marker all work reliably on sealed hardwood. Deep gouges may need wood filler or a wax stick, but those are also inexpensive and widely available. Full refinishing is rarely necessary for everyday scratches.
2 — Does the walnut trick actually work? It works well on light scratches on medium to dark woods like walnut or oak. The natural oils in a walnut half temporarily darken and condition the exposed wood fibers, making the scratch far less visible. Buff with a soft cloth after rubbing and the improvement is usually immediate.
3 — What is the difference between a surface scratch and a deep scratch? A surface scratch sits only in the finish — the clear coat or wax — without breaking the wood fibers underneath. A deep scratch penetrates the wood itself: you can feel it clearly, and it may show raw, lighter wood where the pigment is gone. Each type needs a different repair method.
4 — Will these methods work on red oak, walnut, and beechwood? Yes. Red oak, walnut, and beechwood are all dense hardwoods that respond well to oil-based conditioners, wax sticks, and wood markers. The main variable is color-matching: walnut needs a darker brown, red oak a mid-to-warm brown, and beechwood a lighter natural tone. Always test on an inconspicuous area first.
5 — How do you fix a white water ring versus a scratch? White water rings are trapped moisture in the finish, not actual scratches. They respond best to heat or a toothpaste-and-baking-soda paste. True scratches — grooves you can feel — need oil or wax fill, not heat. The two issues look similar at a glance but need different treatments.
6 — Should I use sandpaper to fix a scratch on wood furniture? Only for deep gouges where you plan to refinish the entire surface afterward. Sanding a scratch in isolation almost always leaves a visible dull patch because the surrounding finish sheen does not match. For everyday repairs, stick to wax sticks, oil-based conditioners, and wood markers.
7 — How do wood coasters prevent furniture scratches? Most everyday table scratches come from glasses, mugs, and objects dragged across the surface. A solid wood coaster absorbs the contact, keeps moisture from pooling, and stops ceramic or glass bottoms from scoring the finish. Used consistently, coasters extend the life of a table surface by years.
8 — Can I use olive oil alone to fix wood scratches? Olive oil alone conditions the wood and temporarily reduces the contrast of a light scratch, but it does not fill or bond. Mixed with a small amount of baking soda into a paste, it works better on surface scratches. For any scratch you can feel with your fingernail, a wax stick or wood marker will give a more durable result.
9 — How long do DIY scratch repairs last on solid wood? Oil and walnut treatments on light scratches can last months with normal use. Wax stick repairs on deeper scratches are durable but will eventually need a touch-up in high-traffic areas. Wood markers are permanent colorants and tend to last longest. None of these methods is as durable as a professional refinish, but they require no special skill and keep furniture looking good between deeper care sessions.
Where to go from here
Scratches on solid wood furniture are a maintenance problem, not a disaster — most of them respond to simple, inexpensive methods in under ten minutes. The hierarchy is straightforward: start with the lightest method that might work, move heavier only if needed, and always finish with a full-surface buff and a protective coat to unify the result.
The longer game is prevention. Our wood coasters collection — including the Beechwood Cookie Coaster Set and the Walnut Wood Coasters Cookie-Shape Set — is sized and finished for everyday table use: flat base, real wood grain, wipes clean, and keeps the contact between glass and table surface from ever reaching the finish. Over months, the difference is measurable in the condition of your table.
You'll also find us on Etsy, where 243 customers have left reviews of our solid wood pieces — a straightforward way to see how the products hold up in real homes before you decide.